 Printing Headers and Footers Setting Page Breaks Setting Paper Size and Orientation Showing and Hiding Gridlines Print Preview

The
first thing you need to do before printing is to fix or modify the page setup
of your worksheet(s). PageSetup controls such things as margins, headers and
footers, paper size, orientation, …Headers
and Footers To automatically repeat text such as a page
number, worksheet title, or date, you can add headers or footers to your
printed worksheet.
Headers are text that prints on the top of every page;
footers appear on the bottom of every page. You can use the built-in headers
and footers in Microsoft Excel or create your own.
1-
Click Page Setup on the File menu, and then click the Header/Footer tab.
OR click Header and Footer from
the View menu.
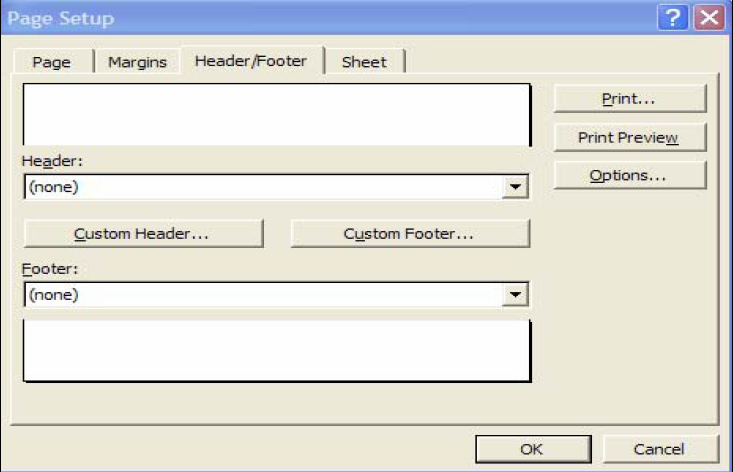
2-Click the header or
footer in the Header box or Footer box.
3-
Click Custom Header or Custom Footer.
4- Click in the Left section, Center section, or Right section box, and then click the buttons to insert the header or
footer information, such as the page number, date, time, file name, that you want in that section.

5-To enter additional
text for the header or footer, enter the text in the Left section, Center section,
or Right section box.
6-
To start a new line in one of
the section boxes, press ENTER.
7-
To delete a section of a
header or footer, select the section that you want to delete in the section
box, and then press BACKSPACE.
▼Setting Page Margins
1-
To set page margins for one
sheet, click the worksheet. To set page margins for more than one sheet, select
the sheets.
2-
On the File menu, click Page Setup, and then click the Margins tab:

3-In the Top, Bottom, Left, and Right
boxes, enter the margin size you want. These settings should be larger than the
minimum margins required by your printer.
Note:To see how the page
margins will affect the printed document, click the Print Preview button before
the document is printed. To adjust the margins in print preview, click Margins,
and then drag the handles.
▼Setting Page Breaks
1.
Click
the heading for the row below the row where you want to insert the page break.
2.
On
the Insert menu, click Page Break.
▼Setting Paper Size and Orientation
1.
Click
the worksheet.
2.
On
the File menu, click Page Setup, and then click the Page
tab:

3.
In the Paper
size box, click the size of
paper you want.
4.
Change the orientation under the Orientation box.
▼Showing and Hiding Gridlines
1.
Click the worksheet.
2.
On the File menu, click Page Setup, and then click the Sheet tab.
3.
Click Gridlines.
▼Print Preview
To see each page exactly as it will print,
click the Print Preview button. In print preview, you can see headers, footers,
and print titles, which are titles that are repeated on every printed page. You
can also change the width of the margins and columns on the worksheet by
dragging the sizing handles. In print preview, you can change the way your
worksheet prints.
With the Setup button, you can turn
gridlines on or off, print the row and column headings, quickly print a draft
copy of your worksheet, and change the order in which pages are printed.

▼Actual Printing
1-
On the File menu, click Print.

2-In the Print
what box, choose either selection (prints a range of cells given that you selected
this range before invoking the Print command), Active sheets (selected sheets), or Entire
workbook.
3- In the Print range box select either All (all pages
in a worksheet), or Pages (a range of pages, From 2 to 5 for
example)
4-
In the Number of copies box, enter the number of copies you want
to print.
5-
Click OK.
No comments:
Post a Comment