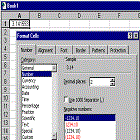
 Formatting features allow you to control the way your
worksheet looks: numeric format of values, font, shading, alignment of entries,
borders, shading, colors, row height, column width, gridlines, and so many
other features that we will cover in this section.
►Formatting Text
You can format your text using the Font tab from the Format Cell dialog box or use
the icons on the Formatting toolbar.
►Changing the Font
1- Select the
cell or range you want to affect.
2- From the
main menu, select Format → Cells to display the Format Cells dialog box.
3-
Click
on the Font tab.
4-Select the font you want from Font scrolling text
area, and click OK:
OR select the
font you want from the Font drop-down menu on the Formatting toolbar:
►Changing the Font
Size
1-
Select
the cell or range you want to affect.
2- From the
main menu, select Format → Cells to display the Format Cells dialog box.
3-
Click
on the Font tab.
4-
Select
the font size you want from the Size scrolling text area, and click OK.
►Changing the Font
Style
1-
Select the cell or range you want to affect.
2- From the
main menu, select Format → Cells to display the Format Cells dialog box.
3-
Click
on the Font tab.
4-
Select
the font style you want from Font style scrolling text area, and click OK.
►Changing the
Underline
1-
Select
the cell or range you want to affect.
2- From the
main menu, select Format → Cells to display the Format Cells dialog box.
3-
Click
on the Font tab.
4- Select the underline style you want from Underline drop-down menu,
and click OK:
►Changing the Font
Effects
1-
Select
the cell or range you want to affect.
2- From the
main menu, select Format → Cells to display the Format Cells dialog box.
3-
Click
on the Font tab.
4-
Select
the option you want from the Effects area, and click OK:
►Resetting Font Formatting
To reset the font formatting of a cell or range to the
defined Normal style, do the following:
1-
Select
the cell or range you want to affect.
2- From the
main menu, select Format → Cells to display the Format Cells dialog box.
3-
Click
on the Font tab.
4-
Select
the Normal Font checkbox, and click OK:
►Changing the Default Font Characteristics
of the Current Workbook
1-
From the main menu, choose Format → Style to display the Style dialog box:
2-Select Normal from the Style name drop-down menu.
3-
Click on the Modify button to display the Format
Cells dialog box:
4-Click on the Font tab on the Format Cells dialog
box.
5-
Select the font and font size you want, click OK to return to the Style
dialog box
6-
Click OK to confirm the changes.
►Changing the
Default Font in New Workbooks
1-
From the main menu, choose Tools → Options to
display the Options dialog box.
2-
Click on the General
tab.
3-
Select a font and font size from the Standard font and Size drop-down menus.
4-
Click OK:
 Formatting and Customizing Data Excel Xp


No comments:
Post a Comment